info@iapk.com
+256-772-586008
Follow us on:


info@iapk.com
+256-772-586008
Follow us on:
Who We Areis not for profit registered entity with limited guarantees. The Institute is registered as a Not for Profit entity with limited guarantees. The activities of the Institute will be directed towards community agricultural skills enhancement, issues of chronic Poverty, Food Insecurity, Sustainable Development, Biodiversity Conservation, Environment Protection and Climate Change Mitigation, Adoption and Adaptation.. Our VisionTo teach practical agricultural knowledge for poverty reduction and sustainable development. |
To carry out a comprehensive scientific integration, promotion, dissemination, and utilization of agricultural technologies and innovations for wealth creation to the rural women and youths in a post-war conflict in northern Uganda.
|
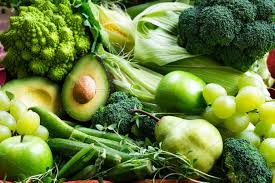
PRINCIPLES OF VEGETABLE PRODUCTION
WHAT IS A VEGETABLE? A vegetable is an edible plant or part of plant used as food. A vegetable may be a root, stem, leaf, flower bud, or a seed. The vegetable may be eaten raw or cooked. Vegetable growing is a part of horticulture, technically referred to as oreliculture.
IMPORTANCE OF VEGETABLES. � Vegetables provide us with minerals salts, vitamins and roughages that are of great importance to our health. Mineral salts contained in vegetables in large quantities are calcium, iron, phosphorus, potassium and magnesium. Vegetables provide us with vitamin A, vitamin of the B group and vitamin C. Roughage is the non-digestible part of the food. Its binds cholesterol and therefore prevents it from accumulating in the body, and also prevents constipation. � Some vegetables are medicinal and protect us from diseases. For example, cabbages prevent gout (accumulation of synovial fluids in the joints), pumpkin controls sickle cells, and bitter local eggplants and Irish potatoes controls hypertension. � Some vegetables can serve as fodder for livestock. � Some vegetables, such as beans, can serve as green manure plants. � When growing commercial crops, farmers earn a lot of income from them. Usually the demand for vegetables is quite high especially in urban centers. � Vegetables production as a business creates employment opportunities. For instance there are people who are engaged in the marketing of inputs like seeds, equipment and chemical as well as vegetables. � Some vegetables are broad �leaved, and can act as soil cover and protect it from erosion. Classification of vegetables They can be classified according to the following characteristics:
Organ or part of the plant eaten; 1. Fruit vegetables, eg., tomatoes, egg plants, pepper, pumpkins and cucumber. 2. Root vegetables e.g., carrots, Irish potatoes, turnips and radishes 3. Stem/leaf vegetables e.g., cabbages, salads, spinach and asparagus. 4. Flower vegetables, e.g., cauliflower and broccoli. 5. Seed vegetables, e.g., beans, groundnuts and peas. 6. Bulb vegetables, e.g., onions, garlic and leeks.
Botanical families; 1. Solanaceae family, e.g., pepper, tomatoes, eggplant, Irish potatoes and Nakati. 2. Brassicaceae family, e.g., cabbages, cauliflower, kale and radish. 3. Cucurbitaceae family, e.g., pumpkin, cucumber and water melon. 4. Leguminosae family, e.g., beans, peas and grams. 5. Alliaceae family, e.g., onion, leek and garlic. Vegetable nursery bed; A nursery bed is a piece of land that is well prepared for the purpose of raising seedlings before they are transplanted to the main field. Vegetables are first raised in the nursery bed because; � Their seedlings require a lot of care when still young and raising them in a nursery reduces the amount of labour that would be needed to take care of a large field. � It becomes easier to protect them from harsh conditions they would be exposed to in the field, such as rainfall, high temperatures and pests. � The seeds of most vegetables are too small to plant in the field at the correct depth and spacing. Types of nurseries; There are two main types of vegetable nurseries, namely sunken and raised nurseries. Sunken nurseries are used in areas that receive insufficient rainfall. They are constructed in such a way that they are able to conserve rain water for long. Raised nurseries are constructed in areas where the water table is close to the soil surface, and there is a possibility of waterlogging during the rainy season.
Seed box; Vegetable seedlings can also be raised in seed boxes or seed flats. The number of boxes used depends on the amount of seedlings needed to cover the area to be planted. A layer of gravel is first laid at the bottom of the box to facilitate drainage. The rest of the boxes are kept in shelter to protect the seedlings from unfavorable conditions.
Advantages of using seed boxes; � The boxes can be moved around as the farmer wishes. � The farmer is able to work on seedlings while standing up instead of bending. � A seed box is more convenient when raising a few seedlings. � The seedlings can be protected from soil-borne pests and diseases, since the soil in the box is sterilized before it is used. Therefore, the armer may not spend money on chemicals to control seedling diseases. Disadvantages of using seed boxes; � Since they are potable, boxes can be carried away by thieves leading to losses. � If not watered well, the seedlings can wilt because the boxes cannot hold water for long. � Extra cost is incurred to buy the boxes. Selecting a suitable site for the nursery; The site for the vegetable nursery should be chosen carefully, and the following points should be considered. Nature of the land. The site should not be steep, otherwise soil erosion will be a problem. Also the site should not be flat, as this will encourage water logging. Gently sloping land is the best, and the bed should run across the slope instead of down slope. Shading. Places heavily shaded by trees or buildings should be avoided because the seedlings will grow poorly due to lack of adequate sunlight. Water source. The site chosen should be close to the water source as possible, since watering will have to be done daily. Soil type. An area with fertile, free draining soil should be selected. If the fertility level is low, organic manure or inorganic fertilizer should be applied. Accessibility. This is important to allow easy movement of people and machinery to and from the nursery site. Nursery bed establishment Materials needed include the following; 1. Tools. The tools that must be available are; � Slasher- for cutting the vegetation. � Hand hoe-for digging the area to soften the soil and remove all vegetation. � Spades � for piling the soil to make a raised bed, or to remove soil so as to make a sunken bed. � Rake � for removing roots of the vegetable and leveling the bed. � Measuring tape- for measuring the bed to ensure that it is of the required size. The size of a nursery should be 1.0 � 1.2m wide and as long as possible, depending on the number of seedlings needed. If it is too wide , it becomes difficult to carry out practices like watering , spraying and weeding. � Sisal string � for ensuring that the sides are straight and also to make straight rills in which to saw the seeds. � Pegs � for serving as supporting onto which the string is tied. � Wheelbarrow � for transporting all the other materials t the site. � Watering can � for supplying water to the bed. � Seed box � if it is to be used as an alternative to an ordinary bed.
2. Ingredients for growth medium. These include: � Sterilized soil � needed if the seed box is to be used. � Compost manure � for improving soil fertility. � Phosphate fertilizer � for supplying phosphorus to the seedlings. � Lime � for raising soil pH in case it is low. � Sand � for improving drainage of soil. 3. Seeds for planting. These should be healthy seeds with high germination capacity. Procedure of nursery bed preparation. � Slash the area to remove all the vegetation � Dig the area to a depth of about 30cm loosening the soil and removing all the vegetation. � Using pegs tie onto a string and a tape, measure out an area of 1.0 � 1.2m wide and of any convenient length. � Make the area into a raised bed and level it. � Sterilize the soil in the bed using either fumigant, such as ethyl bromide or by burning dry grass on the nursery bed. � Mix the soil thoroughly with manure and phosphate fertilizer. Fertilize each square meter with a wheel barrow of compost and four spadesful of sand. This mixture provides all the soil with good drainage and adequate nutrients for seedling growth. � Water the bed a day before sowing the seeds. Sowing seeds in the nursery. Seeds should be sown in rills made across the nursery. The spacing of rills for broad �leaved vegetables like cabbages should be 12 � 15cm apart, and that for vegetables with small leaves, such as onions, should be 10cm apart. Most vegetables seeds are small, thus they should be sown at shallow depths(not more than 2cm). Small seeds should be mixed with a carrier material such as dry sand before sowing. This helps to space the seeds evenly along the rills during sowing, and also not to sow to much seed that would lead to congestion and competition among the seedlings. The nursery should be watered immediately after sowing, and a shade constructed over the nursery to prevent excessive heat reaching the soil, and erosion of bed in case it rains heavily. The shed should be raised about 1.0m above the nursery.
Maintenance of a nursery bed. 1. Mulching. Mulching enables the nursery to retain moisture during dry weather. Paths left between nurseries should be mulched to prevent the edges of the bed from drying out. Mulching also protects the nursery from erosion by runoff and weeds. Chopped dry grass ids the best to use and it should not contain seeds. The mulch should be reduced as the seedling emerges and finally should be gathered in between the rows of seedlings. 2. Providing shade. Young seedlings require a shade to protect them from the sun and heavy rains. The shade should not be too thick, as this will encourage the attack of seedlings diseases. The shade should be reduced gradually as the seedlings put on more leaves and require more sunlight for photosynthesis. 3. Watering the nursery. Young seedlings should be watered daily in the morning and evening. They should not be subjected to water stress, as this would lead to reduced rate of photosynthesis and uptake of nutrients from the soil. Excessive watering should be avoided since it can lead to compaction of soil surface, water logging that interferes with soil aeration, creation of suitable conditions for pathogens to attack seedlings and leaching of nutrients. 4. Fertilizer application. This is usually done during nursery bed preparation and there is no need to apply more when seedlings are still in the nursery. The greatest response to fertilizers and manure is achieved during the early stage of plant growth, hence the need to apply them early if they are to be of any use. 5. Weeding. Iot should be done as early as the weeds appear to avoid competition for water , space, nutrients and light. It can be done using herbicides before sowing, or hand pulling when they have already germinated. 6. Diseases control. The most dangerous disease of seedlings in the nursery is damping off. It is cause by a number of seed borne and soil borne fungi that include phytophthora, pythium, and fusarium species. The seedlings stems are attacked at soil level causing seedlings to collapse and rot at short time. These can be controlled by; � Dressing the seed before sowing � Sterilizing the soil in the nursery � Making sure that the seedlings are not over crowded � Avoiding over watering the nursery. � Remove the weed as soon as they appear in the nursery. 7. Pest control. The pest of major importance is the cutworm, which chops the seedlings at ground level. It can be controlled using insecticides. 8. Picking out. This is the practice of transferring some of the seedlings to another nursery bed, to a seed box, soil block, or into pots to give them more space and avoid overcrowding in the nursery. It is done when the seedlings have acquired two well-developed leaves. 9. Thinning. This is the practice of removing from the nursery and throwing away seedlings that are weak, poorly developed, damaged, diseased and all those that are likely not to give healthy and strong seedlings. This should be done eraly so as to give space for the healthy ones, and to avoid wastage of nutrients and water that would have been used by healthy seedlings. 10. Hardening off. This is the practice of gradually exposing seedlings to field conditions so that they do not suffer shock when taken to the field. This is done towards the end of the nursery cycle, just a few days to the time of transplanting. About two weeks from transplanting, watering and shades are gradually reduced. This enable the tissuses of the seedlings to harden, and are not very much affected by the field conditions when transplanted. 11. Transplanting. This is the practice of transferring young seedlings from the nursery to the main field. This is done when the seedlings have acquired four well developed leaves. Only strong and healthy seedlings are transplanted. Transplanting should be done in the evening so that the seedlings can utilize the cool condition of the night to establish themselves in their new environment. Before removing the seedlings from the nursery, they should be watered so as to soften the soil and avoid damage during as they are uprooted. To avoid root damage, the seedlings should be scooped up from the nursery using a trowel such that each seedling has a ball of soil around its roots. Seedlings should be held by their leaves when lifting them to avoid damage. Once uprooted from the nursery, the seedlings should be planted immediately to avoid excessive water loss that might lead to wilting. The planting holes in the field should be watered first before the seedlings are placed in the holes and then the hole fills with soil. Care should be taken not to bury the seedlings too deep. Only the part that was covered by soil in the nursery should be buried in the soil. After transplanting, the seedlings should be watered so that the soil can settled around the roots. Watering should be continued until the seedlings are well established that is for at least two weeks.
Vegetables rotation; A vegetables rotation is a practice of growing deferent vegetables in a sequence in the same plot of land. This is done in order to optimally utilize the resources such as nutrients and water to minimize the buildup of paste and disease in the area and to sustain soil productivity.
Factors to consider when planning good vegetable rotations; 1. Nutrient requirement. Some plants require large quantities of nutrients in order to grow and give a high yield such crops are called heavy feeders. They should be planted first in the rotation so that they can utilize the large quantities of nutrients available in the sol before they are leached. Such vegetables include cabbages, cauliflower, tomatoes, Irish potato, egg plants and sweet pepper. 2. Kind of root system. Some vegetable such as pigeon peas, tomatoes, asparagus and Amaranthus have a turf root system hence they are considered to be deep rooted. Those with the fibrous roots system e.g. onions, garlic, spinach and cabbages are said to be shallow rooted. In order to utilize nutrients both in the top and lower soil layers, deep rooted groups should alternate with those that are shallow rooted. 3. Botanical classification. Vegetables that belong to same botanical groupings should not follow each other because they are attacked by the same kind of paste and diseases. For example tomatoes and Irish potatoes suffer from late blight cause by bhytophthora infestsnt fungus and bacterial will cause by pseudomonas solanacearum. They also require similar nutrients and therefore, the one that follow the other cannot perform well unless fertilizers are applied to replenish the soil with the required nutrients. 4. Ability to improve soil fertility. Legumes should be included in the rotations because they have the ability to increase the nitrogen contents of the soil. Nitrogen is the nutrient that is required by ever crop in large quantity. Yet it is deficient in most soils because of its mobility and is easily lost from the soil. Being deep rooted; regimes also recycle nutrients from lower to top soil layers. 5. Level of soil fertility. Usually the fertility of the soil is bond to decline after sometime due to the harvesting and carrying away of crop products. This hesitates giving a rest to the land that has been in use so that it can recover and becomes productive again. During the resting phase a mixture of grasses and legumes can be shown and used and a pasture for grazing. As livestock rise they can deposit their excreta which add some nutrients and organic matter to the soil. Also the leguminous forges can add nitrate into the soil through fixation. During the resting phase also the structure of the sol is stabilize since it is disturbed by cultivation practices. Brassicas (brassicas app) Vegetables of this family include cabbages, kale, Brussels sprouts, broccoli and cauliflowers. Since the practices involved in their production are the same and suffer from almost similar pests and diseases, they are covered under this one heading. They are also referred to as Cole crops. These vegetables are eaten boiled although cabbages can be eaten raw as salads. Cauliflower is grown for its flower, which is made up of clusters of unopened flowers. Brussels sprouts are grown for enlarged buds that grow from the main stem.
Growth requirements Climate. Brassicas requires cool, moist conditions and grow well at altitudes greater than 700 m above the sea level. Kale and cabbages are more tolerant to hot conditions than cauliflowers and Brussels sprouts, which can only grow well in the cool high land areas. Soils. Brassicas grow well in soils with a PH range of 5.5 � 6.5. The soil should be deep, fertile, moist and well drained. Table 9.1 gives some varieties of the brassicas, their maturity period and appropriate spacing in the field. COMMONLY GROWN VARIETIES OF BRASSICAS
Field operation. Sowing Brassicas are first raised in the nursery bed and then transplanted to the main field.
Transplanting Seedlings are ready for transplanting after about one month in the nursery, when they have about four true leaves. Transplanting should be done when soil is moist and in the evening when it is cool. About 1kg of compost should be added in each hole and mixed well with soil. Add 20gms of double super phosphate to each hole.
Top dressing When the seedlings are about 20cms high, top dress with CAN fertilizer (apply one table spoon per plant). Three weeks later, top dress again with the same amount of fertilizer. Weeding Keep the field free of weeds until the crops cover the ground.
Harvesting For Brussels sprouts, pick sprouts from the bottom of the plants. Cabbages should be harvested when the heads are firm. In the case of cauliflower, as soon as the white curd is seen, the leaves should be folded upwards and their tips tied together with string so as to prevent discolouration. Cut the head when it is mature and firm. Cut so that there are few leaves around the curd to prevent it from damage during transit and handling. Market it in 1 -2 days after harvesting, when still fresh. For kale, lower leaves should be picked when they are ready. Picking the leaves should be done regularly and sold as soon as possible, before they wither. Field hygiene After harvesting, the stumps should be removed from the field to prevent the carry-over of diseases and pests. If seriously infected by diseases, they should be burnt.
PESTS OF BRASSICAS.
DISEASES OF BRASSICAS Black rot It is caused by a bacterium called Xanthomonas campestris. Symptoms: stems and roots decay, producing a bad smell. The disease can cause total loss in the field where overhead irrigation is practiced. Infection can occur at all stages of growth. The causative agent (pathogen) is seed and soi borne. Control. � Uproot and burn all infected plants � Plant certified seeds. � Practice crop rotation � Practice good field sanitation. � Grow resistant varieties. Dry rot canker (Black leg) It is caused by a fungus called Phoma lingam, and it is seed borne. Symptoms: brown to black spots appear on the seedlings while still in the nursery. Old spots are ash grey in colour and often have small pimples. A dark coloured stem canker extends below the soil level, killing the roots. Mature plants suddenly wilt and die. Control. � Apply a fungicide called copper oxychloride. � Uproot and burn all the infected plants. � As a preventive measure, plant certified seeds. � Practice crop rotation and good field sanitation. � Grow resistant varieties. Damping off It is caused by a number of fungi including Phytophthora and sclerotium spp., some of which are seed borne and others are soil borne. Symptoms: seedlings decay and the whole nursery can be wiped out in a short time. It is more severe under wet conditions, and is the most serious disease of seedlings in the nursery. Control � Apply fungicides such as Dithane M45, Ridomil. � Make sure that the nursery is weed free. � Plant treated seeds and � Avoid over watering seedlings. Ring spot It is caused by a fungus called Mycosphaerella brassicola, and is seed borne. Symptoms: Brown spots appear on the leaves, often with green border. It is spread by wind and compost made from infected materials. Control. � Uproot and burn infected plants. � Spray with Benomyl or Ridomil to prevent the disease from spreading. � Use certified seeds. � Practice crop rotation and field sanitation. Dark leaf spot It is caused by a fungus called Alternaria brassica, and it is seed borne. Symptoms: small spots appear on the leaves of seedlings. On mature leaves, the spot are dark brown and circular. The leaves eventually dry up. If the infection is severe, there may be damping off of seedlings. The stems become soft near the ground and the seedlings eventually collapse. The disease can be spread by wind, water and infected garden tools. Control � Chemical sprays such as Dithane M45 and Thiram. � Use certified seeds. � Practice crop rotation. Downy mildew It is a fungal disease caused by Penenospora parasitica. Symptoms: fluffy fungal growth appears on the underside of the leaves. Later, brown to black patches appear on the upper leaf surface and on stems. It is severe at high altitudes where condition are cool and wet, or in the nursery that is overhead or over watered. The disease is mainly spread by wind and rain. Control � Apply fungicides such as Dithane M45 and Bordeaux mixture on a weekly basis. � Practice good field sanitation. � Practice crop rotation. Tomato (Lycopersicon esculentum) Tomatoes belong to the family known as Solanaceae. They are grown for their fruits, which are rich in minerals, vitamins A and C. tomatoes are the second world�s most important vegetable in terms of production and consumption after brassicas. The varieties of tomatoes can be grouped into two: 1. Those grown mainly for processing. These are elongated and are quick maturing. Example are Roma, San Marzano, Rutger 10 * hybrid, Meinz 1350, Petomech and Earlian. These do not require staking. 2. Those mainly grown for fresh market. These take long to mature, and their fruits are juicy. Examples are Money Maker, Margle, Beauty. Bonny best, Ox heart, Penderosa, Super market, Hotset and Alcerte, Fresh market type of tomatoes grow teller and therefore require staking,. GROWTH REQUIREMENTS; Climate. They can tolerate a wide range of climate conditions, but can be affected by frost. Warm conditions are essential for optimum growth. They perform well within the day temperature range of 21 � 27 oC, the optimum being 24 oC. night temperature should range between 18 � 20 oC. tomatoes are drought-resistant compared to other vegetables, but respond to regular supply of water. They require moderate rainfall of about 0 - 1500 mm per year. A combination of above 20 oC encourages excessive vegetative growth and a high disease incidence.
Soils. Tomatoes require loam, fertility, well drained soils with high organic matter content. Slightly acidic soils with pH 5.0 � 6.5 are the best.
FIELD OPERATIONS Transplanting; Seedlings are first raised in the nursery bed, and then transplanted after 4 � 8 weeks, when they possess 4 � 6 true leaves.
Spacing; This depends on whether they are to be staked or not whether planted on ridges or beds and on the growth habit of the variety i.e. determinate or indeterminate). For staked and pruned varieties, spacing of 90 cm x 45 cm is appropriate. When planted on ridges the spacing should be 75 � 90 cm x 45 � 60 cm. on beds, single tows should be 45 � 60cm x 45cm and 75 � 90cm between double rows. Double rows are used when growing determinate varieties because they are short and busy. Close spacing should be avoided as it encourages the speed of fungal diseases and make spraying difficult.
Munching; This is done using dry grass between the rows. It improves water infiltration, lowers soil temperature which results I reduced loss of soil moisture, suppresses weeds and protects the fruits from contact with the soil.
Weeding; This should be done regularly to avoid competition, transmission of diseases and reduction in quality and quantity of tomato fruits. Fertilizer application; Avoid excessive application of nitrogenous fertilizers, as this would make them become vegetative at the cost of fruiting. Apply fertilizers that supply phosphorus, potassium and calcium, such as NPK, CAN, SSP and DSP.
Irrigation; This should be done in areas when soil moisture is very low, especially during drought. Splashing water onto leaves of the plants should be avoided as it encourages the spread of diseases, particularly blight.
Skating and training; This refers to giving support to the plants. Tomatoes have vines, and therefore, need support so as to raise the fruits off the ground. Tomatoes are staked by erecting sticks about 2m long close to the plants and then tying the tomato stems loosely onto the sticks. A trellis can be used instead of individual sticks. Skating improves the quality of the fruits by removing them from contact with the soil and allowing them to be exposed to light and air.
Pruning; This is the practice of removing side shoots and old leaves from the tomato plants. Pruning is done by pinching out or cutting off side shoots as they appear. When eight clusters of fruits are formed along each branch cut off the growing shoot tips so that no more fruit can form. This encourages the production of good size tomato fruits. Without pruning wider spacing is necessary. Dwarf varieties do no need pruning. Reasons for pruning tomatoes are;- � To avoid competition between the side shoot and the fruits for water and nutrients, which would lead to reduced quality (size) of fruits? � To reduce busyness that would encourage the buildup of paste and disease due to failure of chemical spray to cover the ant properly. � To reduce vegetative growth and therefore encourage fruiting. � To shorten the time taken by fruit to mature as pruning enhances ripening of fruits. � To allow air to circulate freely within the plants.
Harvesting; Intermediate tomatoes (tall varieties) ready for harvesting 10 � 14 weeks from transplanting while for determinate tomatoes harvesting can start 8 weeks from the time of transplanting. Tomatoes for caning should be harvested when ripe but for fresh market they should be harvested just when they start ripening. After harvesting they should be graded according to the size and ripeness.
PASTE OF TOMATOES;
DISEASE OF TOMATOES; Tomatoes late blight; This is cause by fungus called phytophthora infestant. Symptoms; They attack may begin in the nursery causing dumping of black lessons develop on young stems causing breakage at ground level. In the field, water-soaked lesions, irregular in shape appear in stems and leaves. As the disease sunken lesions and on rotting, they become covered by whitish outgrowth. The disease is favored by moist cool condition. It is spread by air. Control; � Spray with fungicides e.g. ridomil and dithane M45, and cobox � Prune off damage plans parts. � Field sanitation e.g. destroys crop residues. � Use clean seeds 1. Eradicate alternate hosts especially weeds.
EARLY BLIGHT; This is caused by fungus called Alternaria solani. Symptoms; the disease begins as small spots on leaves and stems that gradually expand, but veins limit their expansion on the leaves. It is also called target spot because of the light circular and around the spots. It attacks young stems eating away the attacked parts leading to guiding. Attacked fruits fall prematurely. It is spread by air. Infection and spread is favored by humid warm weather. Control; � Practice field sanitation, e.g. destroying crop residues. � Spray with fungicides like Dithane M45, Maneb, Ridormil, etc. � Use clean seeds. � Seed dressing � Plants resistant varieties. � Practice crop rotation. � Eradicate alternate host.
BACTERIAL WILT; This is caused by a bacterial called pseudomonas solanacearum. And it is soil borne. This bacterium is favored by high soil temperature and high moisture content (i.e. hot and humid conditions). The bacteria gains access into the plants, through wounds inflicted to the plants by nematodes. Symptoms; Attacked plants may show one sided wilting i.e. only parts of the plants wilts followed by stunted growth and finally the whole plants wilts. The bacteria caused damaged by interfering with the vesicular systems of the plants, particular the xylem vessels that transport water into the plants. When the stem is cut and suspended in water, a white milky liquid is seen oozing out into the water. Control; � Infected plants should be removed and nrurned. � Practice crop rotation. � Control nematodes. � Grow resistant varieties. � Sterilize nursery bed and seed box. � Use an infected tool.
TOMATO MOSAIC; It is cause by tomatoes mosaic virus. Symtoms; Light and dark green purchase on the leaves. Also affected leaves curl and become deformed leading to reduced leave area for photosynthesis. Finally the crop becomes stunted. Yellow sports appear on the fruit that may lead to rotting. It may be transmitted from tobacco shreds, smokers� hands. Contaminated tools and seed people passing through the field, and smoking while in the tomatoes field. In the field the disease is spread from plant to plant by aphids and white flies. Control; � Plant resisted varieties. � Burn all infected plants. � Plan clean seeds. � Smokers should wash their hands before touching tomatoes plants. � Use clean tools. � Practice crop rotation.
Carrots (daucus carota); This carrot belongs to a family called apiaceous. It is grown from its edible taproot which is either eaten when cooked or raw. It is a good source of vitamin A especially when eaten raw as cooking destroys vitamin A. the commonly grown varieties grown are royal chantenay, nantes red chore and early nantes.
GROWTH REQUIREMENTS; Climate. Requires a cool warm climate. High temperature leads to formation of short roots. They require plenty of rainfalls. Soil. Requires heavily fertilize soil with compost. They grow well within a pH range of 5.5 � 6.5.
Field operations; 1. Sowing. The seeds are shown directly into the field at the rate of 5.5 kg per hector. They are shown in rows and at a debt of about 5 - 10mm and then covered lightly with soil. 2. Spacing. It should be spaced at 30cm between rows and 8cm between plants after thinning. 3. Mulching. This should be done after sowing and the material used should be placed between roads after germination has occurred. 4. Thinning. This is usually done at about 4 weeks after planting. Access seedling within each row should be removed until the spacing of 8cm between plants is achieved. First round of thinning should attach a spacing of 2 cm while the second and third should give a spacing of 5 and 8 cm respectively between pants. 5. Weeding. This is necessary so as to avoid competition between plants and weeds. 6. Fertilizer application. Being a root crop, the carrot does not require a lot of nitrogenous fertilizer but requires phosphorus. Before planting apply double super phosphate at 200kg per hector. When the plants are 10cm high apply CAN at 200kg per hector. 7. Harvesting. The crop is ready for harvesting within 3 � 4 months after planting. Carrots intended for drying should be allowed to grow beyond fresh market size in order to increase the yields. Harvesting is done using hands. The foliage should be removed and the carrots washed. Paste of carrots; The only paste of economic importance is the nematodes which attacks the roots leading to formation of galls. Affected plants become stunted. Control; � Sterilize the soil either by eating it or applying nematicides i.e methyl bromide. � Practice crop rotation. � Do not plant carrots in a field previously planted with Irish potatoes or tomatoes.
DISEASE OF CARROTS; Carrots blight; It�s a fungal disease cause by alternaria duci. Symptoms; small grown black spots with yellow hedges appear along the margin of the leaf and eventually the whole plant turn brown. Control; Spray with fungicides such as peronox or dithanem45.
UNION (ALLIUN CEPA). The union belongs to a family known as alliaceae. It is a biennial plant. The pant form a bulb made up of bases of thicken leafs. The root system is vabrous and shallow. The stem is small and found at the base of leafs. It is used to add flavor to food. Union are used a vegetables added to soup and stem. Arial leafs can also be used for cooking purposes but not as good as bulb. The most commonly grown variety is red creole which is well adapted to Ugandan environments condition. Others are Tropicana high breed, Bombay red, silver king (pleasant taste), green binding and fresh man (good flavor). Growth requirements; Climate. Requires high temperature as it encourages bulb formation, and cool temperature are required for flowering and seed formation. Optimum temperature for development is between 13 � 24 oC, and that for flowering is 24 � 27 oC. requires moderate rainfall throughout the growing period due to shallow root system. Bulbs require a dry period to ripen after the leaves have weathered. Too much rainfall encourages attack by diseases. Soils; Onions perform well on well-drained soils with high organic matter content. They require high levels of potassium and phosphorus but excess nitrogen prolongs the growth period. Alluvial soils and sandy loams with pH 6 - 6.8 are the best, but should be free from bebris and closes these interfere with bulb formation. The surface of the soil should be firmed after seedbed preparation, as this helps to keep seedlings upright and also encourages bulb development.
FIELD OPERATIONS; 1. Nursery bed. Onions are first raised in a nursery and transplanted when hey 4 � 5 well-developed leaves have or when they are about half the thickness of a pencil union should be pruned just before transplanting so as to facilitate hardening and handling during planting called setts, especially in the tropics where unions cannot produce viable seeds. 2. Transplanting. This is done on beds that are about 1.0m wide, and each bed can accommodate 4 -6 rows of plants. Planting depth is 6�8cm. 3. Spacing. This depends on the size of bulbs required, moisture content of soil and the variety planted. Wider spacing gives large bulbs. Close spacing gives small bulbs that are used for vegetative propagation. Appropriate spacing is 30�38cm between rows and 15�20cm between plants. 4. Fertilizer application. Before planting, NPK fertilizer should be applied to the field/garden. Also compost or farmyard manure gives good results. 5. Watering. Onions need a lot of water and irrigation may be carried out during dry seasons. 6. Weeding. Due to poor rotting system, onions are poor competitions for growth requirements with weeds. Therefore, weeds should be effectively controlled. During weeding, care should be taken not to damage the root system. 7. Harvesting. Onions are ready for harvesting, when the leaves start drying, i.e., 14�20 weeks depending on whether and variety. Uproot with a knife by cutting the roots and leave them to dry for 10-14 days, or until the necks are completely dry.
Spring unions are grown for leaves instead of bulbs. Harvesting is done before bulbs form. i.e., when they are 35-45 days old. Roots are trimmed off and the plants washed.
8. Storage. Onions should be stored in a well-ventilated store. Spring onions can be stored at 0 C for 2 weeks. PEST OF ONIONS These include onion thrips, nematodes, onion fly and beet armyworms. Onions thrips are thin brown insects found between the leaves, sheaths and the stem. The tips of affected plants wither and die. All the pests can be controlled using pesticides such as Diazinon, Fenthion or Fenitrotgion.
DISEASES OF ONIONS; Downy mildew; It is a fungal disease caused by perenospora destructor. Symptoms: The bulbs become spongy, a white mass of spores appears on the leaves and finally foliage dries up prematurely. The fungus survives in the dry leaves decaying bulbs. Spores of the fungus are spread by wind and running water. Control; � Use of fungicides such as Benlate. � Crop rotation. � Plant disease-free seedlings.
BACTERIAL SOFT ROT It is caused by Erwinia caratovora. Symptoms: bulbs decay producing bad smell. Control; � Dry the bulbs thoroughly before storage. � Keep in a well-ventilated dry store.
PURPLE CLOCH This is caused by alternaria porfi. Symptoms: small spots appear on the leaves, a bad they enlarge to form purple spots o the infected leaves. Control; � Spray with fungicides such as Ridomil, Dithane M45. � Destroy crop residues. � Practice crop rotation.
IRISH POTATO (SOLANUM TUBEROSUM) Irish potato belongs to the family Solanaceae. Varieties that are gqorn in Uganda include Victoria, Kirsoro, Kabale, Sangema, Malirahinda and Cruza. The crop is grown as a food and cash crop. It is rich in protein, which is equal in quality to that in the eggs and milk. It is the most balanced of all major food crops in nutrients for humans. But it is deficient in some amino acids, i.e. Methionine and Cysteine. GROWTH REQUIREMENTS Climate: although the crop grows well at high altitudes ranging from 1500-3000m above sea level where the climate is cool, new varieties that can yield well at altitudes between 1000 and 1800m have been developed. Irish potato requires moderate rainfall that is well distributed throughout the growing period. Regular rainwater or irrigation of about 25mm per week is required, and should last at least 3 months. Longer rainy seasons will produce higher yields. Lack of adequate water result in a drastic reduction in tuber size.
Soils: it grows well on deep, fertile, well-drained soils with a reasonable amount of organic matter and p of 4.8-5.8. too much organic matter will cause vegetative growth at the expense of tuber formation. Yield is poor on compact soil and this interferes with roots penetration and tuber expansion. Adequate soil moisture is requiring for germination and growth. Excessive moisture may cause rooting of roots and tuber. Irregular water supply cases cracking of tubers. High dry temperatures are good for sprouting but night temperatures above 20 C discourage tubers formation.
FIELD OPERATION 1. Propagation: the crop is propagated by means of small seed tubers. This seed tuber must be free from seed born disease such as bacterial wilt and viruses. 2. Chitting: this is a process carried out just before planting potatoes could break dormancy. Chitting is supposed to be done under defused light. If put in a dark place the tuber will form long and thin sprout which are weak. If chitted in an open place with a lot of light very short and hard sprout will be formed. Chitting shortened the maturity period and result to high yield. 3. Land preparation: should be done early and soil should have good tilt. 4. Planting: it should be done at the onset of rain or just before. Early planting reduces virus infection and gives higher tuber yield. During planting furrows about 10cm deep are made and then the tuber place on the furrow. The tuber is then covered with soil in such a way as to form a ridge over the tubers. 5. Spacing: this deepens on cultivars. Spacing between rows should be 60-70cm. the spacing of plants within a row depends on the purpose of the crop. Close spacing of about 15-20cm is recommended for a seed crop while a wider spacing of about 30cm is appropriate for table potatoes. 6. Weeding: the crop should be kept weed free as the weeds compete for with the crops for moisture, nutrients and light and also serve as alternate host for pest and diseases. 7. Earthing up: this is the practice of peeling soil around the stems of potatoes plants so as to cover their bases. Earthing up encourages expansion of the tuber and also protects potatoes plants form soft root diseases. 8. Harvesting: this is also known as lifting. 2-3 weeks before harvesting the plants should be slashed to make the skin hard. This reduces chances of injuries during harvesting.
PEST OF IRISH POTATOES; Potatoes tuber moth; This is a storage pest but can also attack the crops in the field when conditions are warm and dry. Eggs are lay on exposed tubers in the field. When eggs hatched the lava bore into the tuber and feeds on the tubers flesh. Tuber infestation is characterized by tunnels within the tubers.
Control; � Use of insect repellents such as Mexican, Marigold (tagetes minuta), tick berry (lantana camara and eucalyptus spp). � Apply insecticides. � Plant early. � Earth up to prevent tuber infestation in the field. � Harvesting early. � Crop rotation. � Destroy crop residue after harvesting
APHIDS; There are many species of aphids that attack Irish potatoes but myzus persicae is the most serious one. It transmits the potatoes leaf rot virus. Control; � Isolate seeds potato field from other potato crop so as to avoid virus infection by migratory aphids. � Spray with systemic insecticides, e.g. Dimethoate. � Plant early. � Grow resistant varieties.
NEMATODES; The Root Knot nematode is the mbst dangerous and causes great damage in warm regions. Attacked plants become stunted and yellow. Infected roots have knots o them and the tubers are galled. Control; � Sterilize infected soil with nematicides such as Carbofuran. � Crop rotation with cereals. � Diseases of Irish potatoes;
LATE BLIGHT This is caused by the fungus called Phytophthora infestants. ; are blight is favoured by cool temperatures and high humidity (i.e., cool and moist conditions). Symptoms; it attacks leaves, stems and tubes, small, pale to dark green spots appear and then change into brown or black lesions depending on the humidity of the air. A white mass of spores is visible on the undersurfaces of attacked leaves. Attacked leaves tubers become discolored. Control; � Spray with fungicides, e.g., Dithane M45, Ridomil. � Time the planting season. � Destroy alternate hosts. � Grow resistant varieties, e.g. Sangema and Cruza. � Use clean seed.
EARLY BLIGHT This is caused by the fungus called alternaria solani, which is soil-corne. Symptoms; infection is favored by warm temperatures 920-25 c) and wet conditions. Tubes injured during harvesting are infected by spores present on the foliage, or on the soil surface. Symptoms are brown, angular, necrotic spots marked by a series of concentric rings formed on stems and leaves. Lesions may enlarge and eventually merge resulting in yellowing leaf drop, and early plant death.
Control; � Use clean seed. � Destroy crop residues. � Remove foliage from plants before harvesting. � Timely planting. � Plant resistant varieties. � Spray with fungicides as those used in late blight. � Dispose of injured tuners. � Practice crop rotation.
PSEUDOMONAS BACTERIAL WILT This is cause by the bacterium called Ralstonia olanacerum. It is more serious in warm regions, and it is favored by high temperatures,. The main sources of infection are infected seed tubers and infected soil. In the field, the disease is spread by irrigation water, run-off and flood water, and farm tools and equipment. Symptoms: it causes severe wilting of plants, rotting of stems and tubers. Control: � Practice crop rotation � Fallow infected land. � Destroy volunteer potato plants and weeds. � Fumigate the soil. � Plant clean seed.
BLACK LEG This is caused by Erwinia species, e.g. Erwinia Carotovora. The disease is spread by insects, rain splash and cutting knife. Symptoms; it effects stems and infected stems show an inky black decay, or a black rot beginning at the decaying seed piece and extends up the stem. Stunting occurs in older plants, where the leaves turn yellow and their margins curl upwards and the plant wilts and dies. The vascular system of infected plant becomes discolored. The disease is favored by wet and cool conditions. Control; � Use clean seed. � Avoid planting in wet soils. � Harvest seed tubers when mature to minimize bruises during harvesting. � Destroy sources of infection, e.g. potato curls and crop residues. � Avoid washing the tubers before storage. � Rouguing (uprooting and destroying) infected plants. |
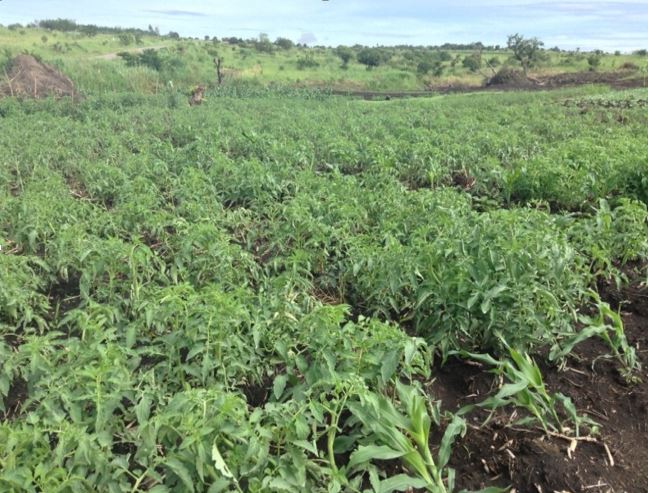
Tomatoes garden |

Cabbages grown by former students of the Institute |

Onion crops |
Physical Address
P.O. Box 4132 GULU
Tel: +256-772-586008
The Institute is locate
on Plots 8 & 10, Philip
Ojok Road leading towards
St. Mourintz